
Battery Tenders, like the Junior model, are essential for maintaining optimal battery health, ensuring reliable power for various devices and vehicles․
Historically, the term ‘battery’ described grouped objects, evolving with Franklin’s capacitor experiments; now, they power everyday appliances with diverse battery sizes․
Understanding the owner’s manual is crucial for safe and effective operation, especially regarding voltage requirements – a minimum of 3 volts is needed for output․
What is a Battery Tender?

A Battery Tender is a specialized charger designed not just to charge a battery, but to maintain it at optimal capacity over extended periods․ Unlike traditional chargers that simply deliver a charge and then stop, a Battery Tender intelligently monitors the battery’s voltage and provides a controlled current to keep it fully charged without overcharging․
As detailed in the Battery Tender owner’s manual, these devices are crucial for batteries that are seasonally used, infrequently used, or stored for long durations․ They prevent sulfation – a common cause of battery failure – by continuously counteracting the natural self-discharge rate․
The manual emphasizes that a Battery Tender won’t initiate charging unless it detects a minimum of 3 volts from the battery, ensuring it only works with batteries possessing some residual charge․ This intelligent approach extends battery life and ensures readiness when needed, powering everything from household devices to golf cart systems․
Why Use a Battery Tender?
Utilizing a Battery Tender, as outlined in the owner’s manual, is paramount for preserving battery health and extending its lifespan, particularly for infrequently used batteries․ Traditional batteries degrade over time due to self-discharge and sulfation, a process a Tender actively combats․
The manual highlights that these chargers are ideal for seasonal vehicles like motorcycles, boats, and RVs, ensuring they start reliably after periods of storage․ They also benefit any battery-powered equipment not used daily, preventing the need for frequent jump-starts or replacements․
Furthermore, a Battery Tender provides a consistent, optimized charge, unlike standard chargers which can potentially damage batteries through overcharging․ By maintaining a full charge, it ensures the battery is always ready to deliver peak performance when required, saving both time and money․

Understanding Battery Types & Compatibility
Battery Tender owner’s manuals detail compatibility with lead-acid (AGM, Gel, Flooded) and lithium-ion batteries, but explicitly warn against using dry-cell batteries․
Lead-Acid Batteries: AGM, Gel, Flooded
Battery Tender owner’s manuals comprehensively cover lead-acid battery types – Absorbed Glass Mat (AGM), Gel, and Flooded – outlining specific charging profiles for each․
These manuals emphasize that lead-acid batteries rely on a redox reaction, where electrons flow through a circuit, attracting cations and storing chemical potential energy․
AGM and Gel batteries, often sealed and maintenance-free, benefit from the Tender’s controlled charging to prevent overcharging and sulfation, extending their lifespan․
Flooded batteries, requiring periodic water level checks, also receive optimized charging, though the manual stresses the importance of proper ventilation during use․
The documentation details how the Tender’s automatic switching mode (float vs․ absorption) caters to the unique charging needs of each lead-acid subtype, ensuring optimal performance․
Always consult the manual for specific voltage and current settings recommended for your particular lead-acid battery configuration to maximize its longevity and efficiency․
Lithium-Ion Batteries: Considerations for Tenders
Battery Tender owner’s manuals provide crucial guidance regarding Lithium-Ion battery compatibility, as these differ significantly from lead-acid types․
The documentation stresses that not all Tenders are suitable for Lithium-Ion; specific models designed for Li-Ion chemistry are required to prevent damage or safety hazards․
Li-Ion batteries demand precise voltage control and charging algorithms, which dedicated Tenders provide, avoiding overcharge, undercharge, and thermal runaway risks․
Manuals detail the importance of verifying the Tender’s compatibility with the specific Lithium-Ion battery’s voltage and capacity before connection․
Unlike lead-acid, Li-Ion batteries don’t exhibit sulfation, but improper charging can degrade their performance and shorten their lifespan considerably․
Always prioritize using a Tender explicitly designed for Lithium-Ion, and meticulously follow the manual’s instructions for safe and effective charging practices․

Batteries NOT Suitable for Tenders (Dry-Cell)
Battery Tender owner’s manuals emphatically state that dry-cell batteries, commonly used in household appliances, are not designed for use with these chargers․
Attempting to charge these batteries with a Tender can lead to irreversible damage, potential leakage of corrosive materials, and even pose a safety risk due to overheating․
Dry-cell batteries, like alkaline and zinc-carbon, possess different chemical compositions and charging requirements compared to rechargeable batteries supported by Tenders․
The Tender’s charging algorithms are optimized for lead-acid and specific Lithium-Ion chemistries, and applying them to dry-cells will disrupt their internal structure․
The manual clearly warns against this practice, highlighting the potential for battery rupture, fire, or the release of hazardous substances․
Always adhere to the manufacturer’s recommendations and only use the Tender with compatible rechargeable battery types to ensure safe and optimal performance․
Battery Tender Features & Indicators
Battery Tenders utilize LED status indicators to communicate charging progress, voltage, and current settings, offering automatic switching between float and absorption modes;
LED Status Indicators: What They Mean
Understanding the LED indicators on your Battery Tender is paramount for monitoring the charging process and battery condition․ Typically, a solid green LED signifies a fully charged battery, indicating the tender has transitioned to float mode, maintaining optimal charge levels without overcharging․
A flashing red LED often signals a problem, potentially indicating a reversed polarity connection – ensure the positive and negative terminals are correctly attached․ Other flashing patterns, as detailed in the owner’s manual, can denote a low voltage situation (below 3V), meaning the battery is too discharged to initiate charging․
A solid red LED usually means the battery is currently being charged in absorption mode, delivering maximum current․ Refer to your specific model’s manual for a comprehensive interpretation of all LED combinations, as variations exist between different Battery Tender units․ Ignoring these signals could lead to improper charging or even battery damage․
Voltage & Current Settings Explained
The Battery Tender’s voltage and current settings are crucial for optimal charging and preventing damage to your battery․ Most tenders automatically adjust voltage based on the battery type and charge state, transitioning between absorption and float modes․ However, understanding the basics is beneficial․
Current, measured in amps, dictates the charging speed; higher amperage delivers faster charging, but may not be suitable for all battery types․ The owner’s manual will specify the appropriate current setting for your battery’s capacity․ Incorrect settings can lead to overheating or reduced battery lifespan․
Voltage should align with your battery’s specifications (e․g․, 12V)․ Using the wrong voltage can cause irreversible damage․ Always consult the manual to confirm compatibility and proper settings before connecting the tender․ Ignoring these guidelines can void warranties and compromise battery performance․
Automatic Switching Mode: Float vs; Absorption
Battery Tenders utilize automatic switching between ‘Absorption’ and ‘Float’ modes to optimize battery charging and maintenance․ The ‘Absorption’ mode delivers maximum current to rapidly recharge a depleted battery, continuing until it reaches full capacity․ This phase is indicated by specific LED status signals, as detailed in the owner’s manual․
Once fully charged, the tender seamlessly transitions to ‘Float’ mode․ This maintains the battery at a constant voltage, compensating for self-discharge and keeping it ready for use․ Float mode prevents overcharging, extending battery life significantly․
Understanding these modes is vital for long-term battery health․ The manual explains how the tender intelligently manages these phases, ensuring efficient and safe charging without manual intervention․ Proper operation relies on allowing the tender to cycle between these modes automatically․
Installation & Connection Procedures
Refer to the owner’s manual for detailed instructions on connecting the Battery Tender to your battery terminals, ensuring correct polarity (positive/negative) is observed․
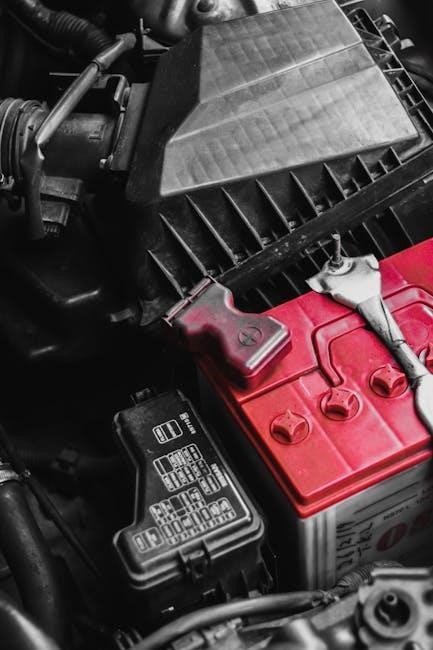
Connecting to the Battery Terminals (Positive/Negative)
Crucially, always consult your Battery Tender owner’s manual before connecting to the battery terminals․ Proper connection is paramount for safe and effective charging․ Begin by identifying the positive (+) and negative (-) terminals on both the battery and the charger’s leads․
Typically, the positive lead (often red) connects to the positive terminal on the battery, while the negative lead (usually black) connects to the negative terminal․ Double-check polarity before making any connections to avoid sparking or damaging the battery and charger․
Ensure the connections are secure and clean; corrosion can impede the charging process․ Firmly attach the alligator clips or ring terminals to the battery posts․ A loose connection can cause intermittent charging or, worse, a hazardous situation; Never reverse the polarity, as this can cause irreversible damage․

Proper Cable Routing & Securing
Refer to your Battery Tender owner’s manual for specific cable routing recommendations․ After connecting to the battery terminals, carefully route the charging cables to prevent damage from abrasion, kinking, or exposure to extreme temperatures․ Avoid running cables over sharp edges or areas where they could be stepped on or driven over․
Secure the cables using zip ties, cable clamps, or other appropriate fasteners to keep them neatly organized and out of harm’s way․ This minimizes the risk of accidental disconnection or damage․ Ensure sufficient slack is maintained to accommodate battery movement or vibration․
Keep the cables away from fuel lines, hot engine components, and moving parts․ Properly secured cables contribute to a safer and more reliable charging experience․ Inspect the cables regularly for signs of wear and tear, replacing them if necessary․
Initial Setup & First-Time Use
Before your first use, carefully review the entire Battery Tender owner’s manual․ Ensure the charger is connected to a grounded AC outlet and that the battery voltage is compatible with the tender’s settings․ The Battery Tender Junior, for example, requires a minimum of 3 volts to initiate charging – it won’t output voltage below this threshold․
Connect the positive (red) clamp to the battery’s positive terminal and the negative (black) clamp to the negative terminal, ensuring a secure connection․ The charger will typically begin assessing the battery’s condition․
Observe the LED status indicators to understand the charging stage․ Allow the tender to complete its charging cycle without interruption․ Regular monitoring, as outlined in the manual, will help maintain optimal battery health and longevity․

Safety Precautions & Warnings
Always avoid sparks and short circuits when connecting the Battery Tender; do not use it on dry-cell batteries, and heed all manual instructions․
Avoiding Sparks & Short Circuits

Prioritizing safety during battery tender connection is paramount․ Sparks and short circuits pose significant risks, potentially damaging the charger, the battery, and even causing personal injury․ Always ensure the charger is disconnected from the AC power source before making any connections to the battery terminals․
When attaching the clamps, never allow them to touch each other or any metallic object while connected to the power source․ Connect the positive (+) clamp to the positive terminal of the battery first, then the negative (-) clamp to the negative terminal․ This sequence minimizes the risk of accidental arcing․
Inspect the cables for any damage – cracks, fraying, or exposed wires – before each use․ Damaged cables should be replaced immediately․ A well-maintained cable ensures a secure connection and reduces the chance of shorts․ Following these precautions will contribute to a safe and efficient charging experience․
Operating Temperature Limits
Maintaining optimal performance and ensuring longevity of both the battery tender and the battery itself requires adherence to specified operating temperature limits․ Exposing the charger to extreme temperatures – either excessively hot or frigidly cold – can negatively impact its functionality and potentially cause damage․
Generally, most battery tenders are designed to operate effectively within a temperature range of 32°F to 104°F (0°C to 40°C)․ Avoid using the charger in environments outside of this range․ Charging batteries in extremely cold temperatures can reduce their capacity and even cause permanent damage․
Similarly, high temperatures can overheat the charger and battery, leading to reduced efficiency and a shortened lifespan․ Always ensure adequate ventilation around the charger during operation to prevent heat buildup․ Refer to your specific owner’s manual for precise temperature specifications․
Indoor vs․ Outdoor Use Guidelines
Battery tenders offer versatility in charging locations, but understanding appropriate usage – indoors versus outdoors – is crucial for safety and performance․ While many tenders are designed for both environments, certain precautions must be observed․
For indoor use, ensure the charging area is well-ventilated and protected from moisture․ Avoid placing the tender on flammable surfaces or near combustible materials․ Outdoor use requires additional safeguards; the charger should be sheltered from direct rain, snow, and excessive sunlight․
Never operate a battery tender in a damp or wet location․ If outdoor use is unavoidable, utilize a weatherproof enclosure to protect the charger from the elements․ Always inspect cables and connections for damage before each use, regardless of location․ Refer to your owner’s manual for specific recommendations regarding environmental conditions․

Troubleshooting Common Issues
If the tender fails to recognize a battery, ensure it’s above 3 volts; flashing error codes in the manual indicate specific problems and solutions․
Battery Tender Not Recognizing Battery (Below 3V)
A common issue encountered with Battery Tenders, particularly models like the Junior, is the charger’s inability to initiate a charge if the connected battery exhibits a voltage below 3 volts․ This is a built-in safety feature designed to prevent potential damage to both the charger and the severely discharged battery․ The manual explicitly states this requirement, emphasizing that the unit will not produce any output voltage until it detects at least this minimum voltage level․
If you encounter this situation, it doesn’t necessarily indicate a faulty charger․ Instead, it signifies that the battery is deeply discharged and requires a different charging approach initially․ Attempting to force a charge on a battery below 3V could lead to overheating or even permanent battery damage․ Consider using a higher-amperage charger briefly to bring the battery voltage up to the 3-volt threshold before connecting the Battery Tender for its maintenance charging cycle․ Always consult the battery’s specifications for appropriate charging parameters․
LED Flashing Error Codes & Solutions
The Battery Tender’s LED status indicator provides crucial diagnostic information through a series of flashing patterns․ While specific codes vary by model, understanding these signals is vital for troubleshooting․ The owner’s manual details these codes, offering solutions for each․ A flashing LED often indicates a problem preventing optimal charging․
Common issues include reverse polarity connections – ensure the positive and negative leads are correctly attached․ A flashing light can also signal a battery that’s damaged beyond recovery or a poor connection at the terminals․ Inspect the cables for corrosion or breaks․ If the problem persists after verifying connections and battery health, consult the manual’s troubleshooting section or contact customer support․ Ignoring flashing error codes can lead to continued charging issues or potential damage․
Charger Not Charging – Potential Causes
If your Battery Tender isn’t charging, several factors could be at play․ First, verify the AC power supply is functioning correctly and the charger is securely plugged in․ The owner’s manual emphasizes a minimum battery voltage of 3V is required for the unit to initiate charging; a deeply discharged battery won’t trigger output․
Inspect the battery terminals for corrosion or loose connections, as these impede current flow․ Damaged or frayed charging cables are another common culprit – replace them if necessary․ Ensure the charger’s polarity is correct (red to positive, black to negative)․ Finally, confirm the charger hasn’t entered a fault mode indicated by a flashing LED; consult the manual for error code definitions and solutions․ If issues persist, a failing charger may require replacement․