
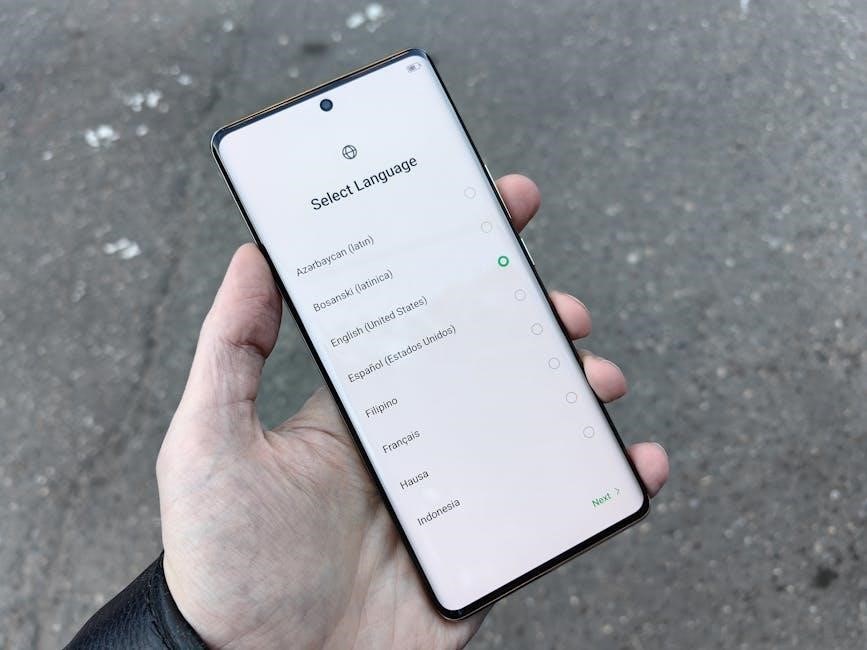
Keurig Mini User Manual: A Comprehensive Guide
This manual details the Keurig Mini’s operation, from initial setup to brewing diverse beverages like coffee and tea, ensuring optimal performance and longevity;
Welcome to the world of convenient, single-cup brewing with the Keurig Mini! This compact brewer is designed for simplicity and efficiency, delivering a fresh, flavorful cup of coffee, tea, or other beverages at the touch of a button. The Keurig Mini is perfect for small spaces, dorm rooms, offices, or anyone seeking a hassle-free brewing experience.
Unlike traditional coffee makers, the Keurig Mini utilizes K-Cup pods, pre-portioned packages containing ground coffee or tea leaves. This eliminates the need for measuring and grinding, reducing waste and ensuring consistent results. With a variety of K-Cup flavors available, you can enjoy a diverse range of beverages tailored to your preferences. This guide will walk you through every step, from unboxing and setup to brewing and maintenance, helping you maximize your Keurig Mini’s potential.
Unboxing and Initial Setup
Carefully unpack your Keurig Mini, ensuring all components are present: the brewer unit, water reservoir, K-Cup pod holder, and this user manual. Inspect for any visible damage during shipping. Before first use, thoroughly clean the removable parts – the water reservoir, K-Cup holder, and drip tray – with warm, soapy water. Rinse completely.
Place the Keurig Mini on a stable, level surface near a power outlet. Fill the water reservoir with fresh, filtered water to the maximum fill line. Insert the reservoir securely. Plug the brewer into the outlet. It’s recommended to perform a preliminary brewing cycle with water only (without a K-Cup) to rinse the internal system. This ensures optimal flavor in your first brewed beverage.
Understanding the Keurig Mini Components

The Keurig Mini boasts a compact design with key functional parts. The Water Reservoir, typically removable, holds the water supply for brewing. It’s crucial to use fresh, filtered water for the best taste. The K-Cup Pod Holder securely accommodates K-Cup pods, facilitating the brewing process. Ensure proper alignment for optimal extraction.
The prominent Power Button initiates the brewing cycle. Some models feature a single button for operation, while others may have separate buttons for brew size selection. Understanding these controls is vital for efficient use. The drip tray catches any potential spills, maintaining a clean brewing area. Familiarizing yourself with each component ensures a seamless and enjoyable brewing experience.
Water Reservoir
The Water Reservoir is a removable component designed to hold the water used for brewing your beverages. It’s typically located at the back or side of the Keurig Mini. Always ensure the reservoir is securely seated before operation to prevent leaks. Using fresh, filtered water is highly recommended for optimal coffee flavor and to minimize scale buildup within the machine.
Regularly check the water level and refill as needed. The reservoir often has a maximum fill line; avoid overfilling. Some models feature a water filter to further enhance water quality. Cleaning the reservoir periodically with mild soap and water is essential for maintaining hygiene and preventing bacterial growth. Proper reservoir care contributes to the longevity of your Keurig Mini.

K-Cup Pod Holder
The K-Cup Pod Holder is the crucial component where you insert your single-serve K-Cup pods for brewing. It’s designed to pierce the pod and allow hot water to flow through, extracting the coffee or beverage. Ensure the pod holder is clean and free of coffee grounds before each use. The pod holder typically features an entry and exit needle; avoid touching these sharp components.
After brewing, carefully lift the handle to eject the used K-Cup pod. Some models have a reusable filter option for ground coffee. Regularly inspect the pod holder for any damage or blockages. Proper maintenance of the K-Cup pod holder ensures a consistent and flavorful brewing experience with your Keurig Mini.
Power Button & Operation
The Keurig Mini’s power button initiates all brewing functions and activates the internal heating system. A single press typically powers the unit on, indicated by an illuminated light. Subsequent presses may initiate the brewing cycle once a K-Cup pod is inserted and water is present. Some models feature a simple on/off switch instead of a button.
The operation is generally straightforward: power on, fill the reservoir, insert a K-Cup, and select your desired brew size. The Keurig Mini automatically stops brewing when complete. Familiarize yourself with the button’s responsiveness and any accompanying indicator lights for optimal use. Always ensure the unit is properly plugged in and the power outlet is functioning.
Filling the Water Reservoir
The Keurig Mini’s water reservoir is crucial for brewing, requiring regular filling with fresh, filtered water for optimal taste. Locate the reservoir, typically at the back or side of the machine, and remove it carefully. Fill it with the desired amount of water, observing the maximum fill line indicated on the reservoir itself – avoid overfilling.
Reinsert the reservoir securely, ensuring it clicks into place. Proper seating is vital to prevent leaks during brewing. Using filtered water minimizes scale buildup, extending the lifespan of your Keurig Mini and improving beverage quality. Regularly check the water level before each brew to avoid running the machine dry.
Inserting a K-Cup Pod
Proper K-Cup pod insertion is essential for a successful brew with your Keurig Mini. Lift the K-Cup pod holder handle located on top of the brewer. This reveals the K-Cup receptacle. Select your desired K-Cup pod – Keurig Mini is compatible with a wide variety of flavors and brands. Carefully insert the pod into the receptacle, ensuring it sits flat and is fully seated.
Close the K-Cup pod holder handle firmly until it clicks shut. This pierces the pod, preparing it for brewing. Avoid forcing the handle closed; if resistance is felt, check the pod’s alignment. A properly sealed pod holder prevents leaks and ensures optimal water flow through the coffee grounds.
Brewing Your First Cup
Now that your Keurig Mini is set up and a K-Cup pod is inserted, it’s time to brew your first cup! Ensure the water reservoir is adequately filled and the drip tray is securely in place. Press the power button to initiate the brewing process. The Keurig Mini will begin heating the water automatically.
Once heated, the brewer is ready. Select your desired brew size – options typically include 6, 8, or 10 ounces. Press the corresponding button to begin brewing. The machine will pump hot water through the K-Cup pod, delivering freshly brewed coffee directly into your mug. Enjoy your first cup!
Selecting Brew Size
The Keurig Mini offers multiple brew sizes to accommodate different cup sizes and desired coffee strengths. Typically, you’ll find options for 6, 8, and 10-ounce brews. A smaller brew size (6oz) delivers a more concentrated flavor, ideal for a robust coffee experience or smaller mugs.
The 8-ounce setting is a standard size, perfect for most everyday coffee mugs. For larger travel mugs or those who prefer a bigger serving, the 10-ounce option is best. Simply press the button corresponding to your preferred size before initiating the brewing cycle. Experiment to find the brew size that best suits your taste!
The Brewing Process Explained

Once the water is heated and the K-Cup is properly inserted, the Keurig Mini initiates its brewing cycle. The machine pierces the K-Cup, allowing hot water to flow through the coffee grounds under pressure. This pressurized system extracts the flavors and aromas, delivering a quick and convenient cup of coffee.
The brewing process typically takes under a minute. You’ll hear the machine working as it pumps water and then stops when the selected brew size is reached. The used K-Cup is then automatically ejected, ready for disposal. Always allow the machine to cool slightly before handling the ejected pod to avoid burns.
Cleaning and Maintenance
Regular cleaning is crucial for maintaining your Keurig Mini’s performance and ensuring the best-tasting beverages. Daily, rinse the removable parts – the drip tray, K-Cup pod holder, and water reservoir – with warm, soapy water. Avoid abrasive cleaners, as they can damage the plastic.
Periodically, descaling is necessary to remove mineral buildup that can affect brewing quality; Use a Keurig descaling solution or a mixture of white vinegar and water, following the instructions in the manual. A clean machine brews better coffee and extends the lifespan of your Keurig Mini, preventing potential issues.

Descaling the Keurig Mini
Descaling removes mineral buildup, vital for optimal performance. Begin by emptying the water reservoir and adding the Keurig Descaling Solution, or a 1:1 mixture of white vinegar and water, to the reservoir. Run a full brewing cycle without a K-Cup pod. Repeat this process several times until the ‘Descale’ light illuminates.
Once illuminated, allow the Keurig Mini to sit for at least 30 minutes. Afterwards, run at least three full brewing cycles with fresh water only, to thoroughly rinse away any remaining descaling solution or vinegar. This ensures no residual taste affects your next brew. Regular descaling, every 3-6 months, keeps your Keurig Mini functioning efficiently.
Cleaning Removable Parts
Regular cleaning of removable parts maintains hygiene and brew quality. The water reservoir, K-Cup pod holder, and drip tray are easily detachable for cleaning. Wash these components with warm, soapy water after each use, or at least weekly, to prevent buildup. The K-Cup pod holder can be disassembled for a more thorough cleaning, ensuring no coffee grounds remain.
Avoid using abrasive cleaners or scouring pads, as these can damage the plastic. Rinse all parts thoroughly with clean water and allow them to air dry completely before reassembling. Inspect the needle that pierces the K-Cup pod regularly and clear any obstructions with a paperclip if necessary. Consistent cleaning extends the lifespan of your Keurig Mini.
Troubleshooting Common Issues
Encountering problems? Here’s a quick guide to resolve typical Keurig Mini issues. If the unit won’t power on, check the power cord connection and ensure the outlet is functioning. For water dispensing problems, verify the reservoir is properly seated and filled. A clogged needle can also cause this; try clearing it with a paperclip.
K-Cup pod issues often stem from incorrect pod insertion or a damaged pod. Ensure the pod is fully inserted and not bent. If problems persist, try resetting the brewer by unplugging it for a few minutes. Remember to consult the full manual for detailed solutions and safety precautions before attempting any repairs.
Keurig Mini Not Turning On
If your Keurig Mini fails to power on, begin with the simplest checks. First, confirm the power cord is securely plugged into both the brewer and a working electrical outlet. Test the outlet with another device to rule out an outlet issue. Inspect the power cord itself for any visible damage, such as fraying or cuts.
Next, ensure the unit isn’t experiencing a temporary internal reset. Try unplugging the Keurig Mini from the outlet for approximately 60 seconds, then plugging it back in. If these steps don’t resolve the issue, consult the warranty information or contact Keurig support for further assistance.
Water Not Dispensing
If your Keurig Mini isn’t dispensing water during brewing, several factors could be at play. Initially, verify the water reservoir is properly seated and filled with an adequate amount of fresh water. Ensure the reservoir is not overfilled, as this can sometimes cause issues. Next, check for any visible blockages in the water inlet or the exit needle.
A buildup of mineral scale can also restrict water flow; descaling the unit (refer to the ‘Descaling the Keurig Mini’ section) is crucial. If the problem persists, try a hard water reset by repeatedly turning the unit on and off. If none of these steps work, contact Keurig customer support.
K-Cup Pod Issues

Encountering problems with K-Cup pods during brewing is common, but often easily resolved. First, confirm the pod is correctly inserted into the K-Cup pod holder, ensuring it’s fully seated. Check for any damage to the pod itself – a torn or improperly sealed pod can cause issues. Sometimes, the entry or exit needle may be clogged with coffee grounds; carefully clean these with a paperclip (when the unit is off!).
If the Keurig Mini fails to pierce the pod, a more thorough cleaning of the needle assembly might be necessary. Ensure you are using compatible K-Cup pods; some third-party pods may not function correctly.
Replacing the Water Filter
Maintaining a fresh water filter is crucial for optimal Keurig Mini performance and beverage taste. Keurig recommends replacing the filter every two months, or after approximately 60 tanks of water. To replace, first, remove the water reservoir. Locate the filter cartridge within the reservoir – it’s usually at the bottom. Gently pull the used filter upwards to remove it.
Next, unwrap a new Keurig water filter and insert it into the designated slot, ensuring it clicks securely into place. Rinse the filter thoroughly under cool water for one minute before use. Reassemble the water reservoir and enjoy consistently fresh-tasting coffee!
Understanding the Auto-Off Feature
The Keurig Mini incorporates an automatic shut-off feature designed for safety and energy conservation. This feature automatically powers down the brewer after a period of inactivity, typically around five minutes following the last brew. This prevents accidental overheating and reduces energy consumption when the machine isn’t in use.
The auto-off function is a standard safety protocol. Don’t be alarmed if your Keurig Mini shuts off during a brief pause. Simply press the power button to reactivate it; This feature doesn’t affect the brewer’s performance or lifespan; it’s a convenient and eco-friendly addition.
Brewing Different Beverage Types
While primarily known for coffee, your Keurig Mini is versatile and can brew a variety of beverages using compatible K-Cup pods. Beyond standard black coffee, explore options like flavored coffees, lattes (with appropriate K-Cup varieties), hot chocolate, and a diverse selection of teas.
Experiment with different K-Cup brands and flavors to discover your preferences. Remember that brew quality depends on the pod itself; Keurig offers a vast range. For tea, consider using K-Cup pods specifically designed for tea brewing to ensure optimal flavor extraction. The Keurig Mini simplifies enjoying diverse hot beverages with minimal effort.
Coffee
Brewing coffee with your Keurig Mini is straightforward. Insert your preferred K-Cup coffee pod into the K-Cup holder, ensuring it’s properly seated. Select your desired brew size – typically 6, 8, or 10 ounces – using the corresponding button. The Keurig Mini heats the water and forces it through the K-Cup, delivering a fresh cup of coffee in minutes.
Experiment with different coffee K-Cup varieties to find your ideal roast and flavor profile. From light and bright to dark and bold, the options are extensive. Remember that the strength of the coffee depends on the K-Cup itself, not adjustable settings on the machine. Enjoy a consistently delicious cup every time!
Tea
The Keurig Mini is also excellent for brewing a quick and convenient cup of tea. Utilize K-Cup pods specifically designed for tea – a wide variety of black, green, herbal, and specialty teas are available. Insert the tea K-Cup into the holder, just as you would for coffee. Select your preferred brew size; a smaller size (6 or 8 ounces) is generally recommended for tea to prevent bitterness.

For optimal flavor, consider a slightly cooler brew temperature if your Keurig Mini offers that option (some models do not). Enjoy the simplicity of a perfectly brewed cup of tea without the hassle of traditional methods. Explore different tea blends to discover your favorites!
K-Cup Pod Compatibility
The Keurig Mini is designed to be compatible with most standard K-Cup pods, offering a vast selection of beverages. However, it’s crucial to use K-Cup pods specifically designed for Keurig brewers to ensure proper functionality and prevent damage to the machine. While officially licensed K-Cup pods are recommended, many third-party brands also offer compatible options.
Be aware that some older or non-standard K-Cup pods may not function correctly. Avoid using refillable K-Cup pods that are not specifically designed for the Keurig Mini, as they may cause issues. Regularly check the Keurig website for an updated list of compatible pods and any known compatibility concerns.
Safety Precautions
Always exercise caution when operating the Keurig Mini. Avoid touching hot surfaces during and immediately after brewing, as they can cause burns. Never immerse the brewer in water or any other liquid. Ensure the brewer is placed on a stable, level surface before use to prevent accidental tipping.
Unplug the Keurig Mini when not in use and before cleaning. Do not operate the brewer with a damaged cord or plug. Keep the cord away from hot surfaces. Supervise children when the brewer is in operation. Only use the brewer for its intended purpose – brewing beverages with K-Cup pods. Improper use may result in injury or damage.
Energy Saving Tips
Maximize energy efficiency with your Keurig Mini. Utilize the automatic shut-off feature; the brewer automatically powers down after a period of inactivity, conserving energy. Avoid unnecessary brewing – only brew the amount of coffee you’ll consume to minimize wasted energy and resources. Regularly descale your Keurig Mini, as mineral buildup can reduce brewing efficiency and increase energy consumption.
Consider brewing multiple cups consecutively when possible, rather than repeatedly heating the water for single servings. Unplug the brewer when not in use for extended periods to eliminate phantom energy draw. These simple steps contribute to a smaller carbon footprint and lower electricity bills.
Keurig Mini Specifications
The Keurig Mini boasts a compact design with dimensions of approximately 12.5 inches high, 6.7 inches wide, and 12.1 inches deep. It typically operates at 1500 watts and requires a standard 120V power supply, compatible with 60Hz frequency. Water reservoir capacity is around 40 ounces, allowing for multiple brews before refilling. The unit supports K-Cup pods, offering a wide variety of beverage choices.
Brewing options generally include 6, 8, and 10-ounce cup sizes. The Keurig Mini’s weight is approximately 8.6 pounds. It features a simple on/off button and indicator lights for operation and maintenance alerts. These specifications ensure convenient and efficient single-cup brewing.
Warranty Information

Keurig typically offers a one-year limited warranty on the Keurig Mini, covering defects in materials and workmanship from the original purchase date. This warranty doesn’t cover damage resulting from misuse, accidents, or unauthorized repairs. Proof of purchase is required for all warranty claims. Keurig’s customer service will guide you through the claim process, potentially requiring product return for inspection.
The warranty covers repair or replacement of the defective unit at Keurig’s discretion. Extended warranties may be available for purchase separately, offering additional coverage beyond the initial one-year period. Review the full warranty details included with your Keurig Mini for complete terms and conditions.
Frequently Asked Questions (FAQ)
Q: Why won’t my Keurig Mini turn on? Ensure the unit is plugged in and the outlet is working. Try a different outlet to confirm. Q: What if water isn’t dispensing? Descale the unit, as mineral buildup can cause blockages. Check the water reservoir is properly seated. Q: My K-Cup pod isn’t piercing. Ensure you’re using compatible K-Cup pods and the pod holder isn’t clogged.
Q: Can I use my own ground coffee? While not designed for it, reusable K-Cup filters are available for purchase. Q: How often should I descale? Every 3-6 months, depending on water hardness. Q: What does the auto-off feature do? It conserves energy by automatically shutting off after a period of inactivity.
Where to Find Additional Support
For comprehensive assistance with your Keurig Mini, several resources are readily available. The official Keurig website (keurig.com) hosts a detailed FAQ section, troubleshooting guides, and downloadable user manuals. You can also access their virtual assistant for immediate support.
Keurig’s customer service team is reachable via phone at 1-866-901-2739, offering personalized assistance with any issues you may encounter. Furthermore, a vibrant online community forum allows users to share tips, solutions, and experiences. Social media channels, like Facebook and Twitter (@Keurig), provide another avenue for quick questions and updates. Don’t hesitate to utilize these channels for a seamless experience.

Keurig Mini vs. Other Keurig Models
The Keurig Mini distinguishes itself through its remarkably compact design, ideal for smaller spaces and single-serve brewing. Unlike larger Keurig models offering multiple brew sizes and features, the Mini primarily focuses on simplicity and convenience. It typically offers a single brew size option, catering to standard mugs.
Compared to models like the Keurig K-Elite or K-Supreme, the Mini lacks features such as temperature control, strong brew settings, and iced coffee options. However, its affordability and space-saving footprint make it a compelling choice for users prioritizing basic functionality. It’s a streamlined solution for quick, individual cups, foregoing the advanced capabilities of its more elaborate counterparts.